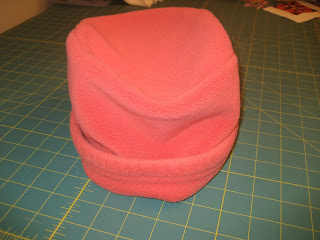
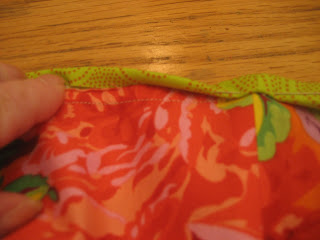
I made a bunch of these caps last March . . .
Recently I was asked to share the pattern or tutorial.
Haha! I didn't have either.
So here goes . . . my first tutorial.
I used a LL Bean fleece hat I had as inspiration.
First up, pick out three fabrics,
outside, inside and binding.
I used a plate I had to trace the crown of the cap.
This plate is 6 1/4" in diameter.
You will need to measure your head to see what will fit you.
I used 23", including seam allowance for the circumference of the cap.
(If you need a different size for your circumference, please substitute that number
for the 23" through out this tutorial.)
Here you see:
The circle crown, 6 1/4" round, cut from both fabrics.
The band for the cap is 7" wide by 23" long, cut from both fabrics.
The binding 1 1/4" wide, by 23" long.
Take the first set of pieces for the inside of the cap.
You'll need to mark the top piece in quarters for pinning.
I used an iron and just folded the circle and pressed.
(Think I need to wash my ironing board cover?)
Next, take the band piece and sew it up the sides, rights sides together.
(Sorry, I didn't take a picture of that.)
Then, press the seam open.
Fold the band in half and then half again,
lining up with the seam, and press the top for markings
to line up with the top piece.
Here you can see how the press marks will guide you.
With right sides together, pin the four pressed marks.
Then carefully pin the rest of the seam.
You will have to make little tucks here and there to make it fit.
I think I had one or two tucks per quarter.
It's not an exact science.
Then off to the sewing machine!
You'll need to repeat this process with the other fabric for the outside of the cap.
Carefully press the seam to the band side.
Now that you have both sides done,
it's time to layer them.
The lining should be right side in,
And the outside fabric right side out.
Line up the two seams at the top and bottom of the cap and pin.
This will keep it straight when you pin and sew.
Take the binding piece and close the end and press open.
Pin the binding to the hat right sides together on the outside fabric.
You will be sewing through all three layers, like a quilt.
Sew around the rim and press to the rim side.
Carefully tuck and roll the binding over and pin.
(This is like a quilt binding.)
I used hand sewing to tack down the edge.
You could use machine sewing or a decorative stitch it you liked.
And there you have it.
The cap is reversible too!
I hope that is clear. And that you enjoy making these little caps.
They are quite fun!


here in Minnesota -- we'd need some insulation !! an easy addition ... thanks for sharing -- can't wait to try one.
ReplyDeleteWow--very detailed and documented. Congrats on your first tutorial!
ReplyDeleteI will give this a try, Lisa. Hope to wear it to our next Metro Mod meeting!
ReplyDeleteI made one today and my oldest girl claimed it for herself (my first try was a little tight for my head anyways). I am going to make another one for me and a little one for my toddler, with the addition of some batting and quilting. I had a hat similar to this in high school (without the turn up brim) and I wore it so much it finally fell apart! This will get a lot of use around my house. Thank you very much.
ReplyDelete